Customizing Comment Box

Thanks Randy for the suggestion with creating individual pages for each issue. I have a few things, but to even it out, I'll try to make it as easy as possible for people in the future to find these and get help from it.

Now as Sarah Fan pointed out on this post for another topic: http://my.spruz.com/pt/Schedualing-video-dates-and-editing-duration-Is-there-a-request-category-anymore-1.23.2013/discussion.htm 

The comment boxes for my are facing some difficulties. I already made a post about this in the old forums, but alas, they are no longer active, so allow me to retread.

Some stuff is working. For those wanting to change the background: Here's what Iv'e had in my custom modifier box.


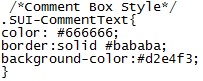
/*Comment Box||Removes Comment Box Background Color*/
.SUI-Comment .element-row2 {
color: #666666;
border:1px solid #bababa;
background-image:url(comments2_bg.jpg) !important;
background-color:#d2e4f3;
background-repeat:repeat-x;
}
 
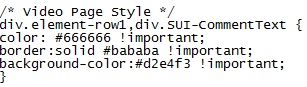
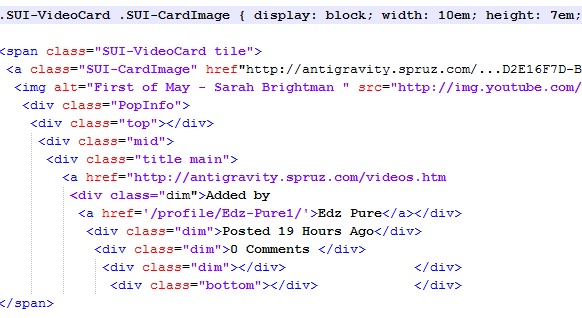
If you see though, I have a bunch of other specifications, but the only thing that's having an affect on my comments box is the background change. Text doesn't change, border or background color. The last custom effect I'm trying to make is add this little arrow to go in between the comment and the member profile picture:
It should fit nicely with the top of the comment box, and the member picture or comment box would have to be narrowed down in order for that gif to fit inside that tiny gap, but I or anyone else should finely be able to adjust it for their liking once given the code.
Rate0

Replies

  • CORRECTION, SEE RANDY'S POST BELOW -- here's what I should have said the first time:

    CSS Grouping and Nesting Selectors
    Grouping Selectors:
    "In style sheets there are often elements with the same style.
    To minimize the code, you can group selectors.
    Separate each selector with a comma.
    In the example below we have grouped the selectors from the code above:
    Example:
    h1,h2,p
    {
    color:green;
    }"

    [ for some additional hints on setting and positioning colors, you can go here: http://www.w3schools.com/html/html_css.asp ]

    Remember, browsers are different in how they handle CSS. Also, if you accidently leave a comma at the end of the list, none of your CSS will have any effect.  I'll update this post as I go along.

    EDIT:  [ What I was trying to say, badly it seems, is when trying to deal with code that is problematic, or not performing to expectations, we need to look at each element separately.  Usually, we can expect a container element to set properties for the child elements it contains.  But this might not be the case if the child is inheriting properties from somewhere else, such as a CSS file we may have loaded or imported separately. 

    For example, the main style for our Spruz sites, style.css is imported.  If you try to save a Spruz page to your desktop, it won't look the same because the browser does not save the imported CSS:  @import url('/user/556928/theme/design/Before/style.css?2013203140213');  This might cause us to scratch our heads a bit, if we were not aware of what is supposed to happen here. ]

    Okay, to start, erase all the stuff you put in above.  We'll do videos first.  Then just add this to begin with:

    Then check out how your comment boxes look, and see if you like it.  You should see a light blue theme, with light gray text and borders.  The secret to all this is 'one step at a time.'  I am assuming you are trying to set element-row2, the header text, the same style.  Bear in mind, though, the actual container for the video page is:  div.element-row1.  We set this to 1235px on Antigravity to be able to display wide screen videos.

    So now, erase everything we've done up to now, and if you want to style the whole video container plus the comment boxes -- replace with this:

    Next we can take a look at the profile comments, but your video comments were badly in need of a change. 

    The file style.css overrides the scripted style in the header, unless you enter it like this:

      td.element-row1
      {
      color:black !important;
      background-color:yellow !important;
      }

    the above changed my profile comment boxes to black on yellow once I added "!important;" to both lines.  You should have no trouble if you do it like that. The comment client area style is controlled by it's container, "td.element-row1."


    Reply
  • Just a quick interjection:

    "Well, for openers, anytime you list more than one CSS id or class together  before the {brackets}, always separate the individual id or class names with a comma."

    This is not the case. You do not always want to put a comma in between your Id's or classes. The comma serves a special purpose and functionality. The comma is what differentiates between two things being addressed, or one thing being addressed.

    For example: Let's say we have two divs. Each of the divs have a different ID, and both divs have a div class inside of them having the same name. Example below:

    <div id="firstdiv">
    <div class="element-row1">
    This is some sample text
    </div>
    </div>


    The second example below:

    <div id="seconddiv">
    <div class="element-row1">
    More sample text
    </div>
    </div>

    Now, as you can see, both snippets have different div id's to start out with, and they house everything that is in the middle, being the "class", The div class that is inside both of the divs (hightlighted in blue) has the exact same class both times. SO..... what happens if we only want to change the style of what is in "1" of those div classes? This is where the Comma gets left out.

    So, if I wanted to only style the .element-row1 contents that's in the first div, it would look like this:

    This will add a border to it:

    #firstdiv .element-row1{
    border: solid 1px black
    }

    Notice there is no comma, and there as well should not be one. Now if I wanted to style only the .element-row1 contents that are in the second div it would look like this:

    #seconddiv .element-row1{
    border: solid 1px black;
    }

    Notice again, I didn't use a comma, and the logic is, by not using a comma, that becomes one complete statement, and you are targeting things in detail.

    In the case that I did this:

    .element-row1{
    border: solid 1px;
    }

    That would target the contents of both .element-row1 div classes and they'd both get borders.

    In the case that I put a comma in like so:

    #firstdiv, .element-row1{
    border: solid 1px black;
    }

    That code would actually put a border on two things, when I only wanted it to be on one. Firstdiv is listed, and separated by the comma, which then says that more is coming that needs that same styling. So .element-row1 will also get the border as well.

    Commas in otherwords "should" not always be used when listing more than 1 div or class, and have a very specified purpose in Css.

    Reply
  • Yes, I believe you are right on that, Randy, thanks for the clarification.  I'm afraid I worded that rather badly.

    EDIT:  See correction ^above ^.

    Reply
  • Randy is right, of course, and as much as I deal with video links, I should know better.. It's what I get for trying to post when I'm tired and stupid.  Take for example, a snippet of code from a Spruz video thumbs display:


    The CSS line beginning is at the top, and the classes involved are .SUI-VideoCard .SUI-CardImage (and note no comma).  The span is being used as a container for the link, and the CSS statement refers to the video link itself.  Note that an element may inherit more than one class, and also an id and more than one class.  

    Thumbs are displayed this way so you don't have to define a rigid table for the display, and the arrangement is flexible, and will reformat itself as the browser dimensions change.

    Right again, Randy...

    Reply
  • I have added a comment box to my homepage so memmers can leave a comment for everyone...however heres the problem....if a pic is posted over 350px wide it stretches my homepage....not all members know how to resize the pic...was wondering if there was some css code to auto resize a pic....thanks...Trevor

    Reply
  • @Wolf:  I forgot your URL, and your profile states that only friends can message you, but you have no friends -- LOL. 

    Reply
  • Yes Sarah....billy no mates me....ive changed my settings now....

    Reply
  • On the page that has the comment box, you could probably just get away with putting something like the code below in an html code box element.


    <style>
    .SUI-CommentText img{
    max-width: 100%;
    }
    </style>
     
    If by chance that didn't sort things out though, you could also do the same by setting the width and height exactly with a pixel value.
     
    <style>
    .SUI-CommentText img{
    max-width: 200px;
    max-height: max-height: 230px;
    }
    </style>
     
    Doing things that way however, you'll run into the issue of images scaling poorly and looking bent out of shape, depending on their dimensions and resolutions.
     
    Give both of those a go and play around with the numbers a bit and see how they work out for you. 


    Reply
Please Sign In to Add a Comment
or

This website is powered by Spruz